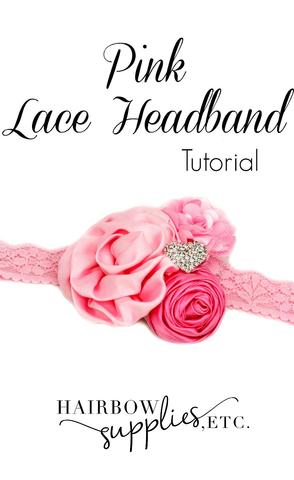
I love babies and toddlers dressed up in pink lace and flowers. This cute Pink DIY Lace Headband is so easy to make and looks like you bought it at a boutique. It's just adorable and would look really beautiful to accent a Valentine's Day dress for your little girl.
This reminds me of when my daughter had her first photo shoot when she was a baby. There was the photographer, 3 moms (including me), and our 3 little girls. They were dressed to the 9s... hair curled, sweet smiles, just dolled up in their little outfits. The sun was shining through the trees. You know when it's really early in the morning and the rays of sun is coming through the trees!? Yes, well really early means chilly too. But the sun was just right for the photographer so it was the best time do it. The girls were freezing. And one of the girls was just gorgeous. But it's funny to see what happens behind the scenes of these photo shoots. The moms dancing around the girls, hopping and waving our hands in the background to do anything to make the girls smile. And the prettiest girl, who was the youngest, was just having a bad day and just did not want to smile. Poor mama had to work extra hard promising ice cream and candy, and whatever else to make her daughter smile. In the end the pictures were amazing. I can't imagine being a photographer every day. It's amazing what goes on behind the scenes to make those beautiful shots!
Where were we? Oh yeah! Let's make a pretty pink lace headband!

- Gather the supplies you need which are all available in our shop here:
16 Inches Lace Elastic
3 Flowers
- Take 1 of your felt circles and your largest flower. Put a little hot glue on the right edge of your felt circle and add the flower so it overlaps the edge, but doesn’t cover the whole circle.
- Hold the flower’s petals out of the way and add more glue to another edge of the felt circle. Put your 2nd flower on the glue and snug it up against the 1st flower, while making sure to leave a little bit of the felt circle open.
- Add more hot glue to the last edge of your felt circle and snug your 3rd flower up against the other 2.
- Decide on the cutest spot for your rhinestone button and glue it in place. (I like to put mine where the 3 flowers come together.)
- Flip your flower cluster over so the felt circle faces up. Take your 2nd felt circle and glue it so it overlaps the bottom of your largest flower and the 1st felt circle. (This makes your flower cluster stronger.)
- Take your lace elastic and find the shiny side. Turn it shiny side down and glue one end onto the felt circle on your flower cluster. Use the tip of your scissors to press the lace elastic into the glue; this way you won’t burn your fingers.
- Loop your elastic around, making sure it’s not twisted, and glue the other end slightly on top of the 1st Press this end down with the scissors tip.
- Take your 3rd felt circle and glue it so it covers the lace elastic overlap. Now the back looks nice and finished!
That’s it! Your adorable baby Headband is ready to wear. You can mix things up with other colors of lace and flowers. Make one to match each of your little one’s outfits, or one for each holiday!
For another really cute project, check out the DIY scrunchies blog post to view how to make hair scrunchies..
To go with a beautiful pink lace headband, check out this vintage ivory lace headband tutorial..

