
Well today – we’re just learning to make felt flowers for headbands or hair clips. All you need is the basics: Scissors, hot glue, pearl button, and a piece of felt. I got my felt for like 25 cents a piece. Imaging how cost effective to make a dozen flowers out of a 25 cent piece of felt! Being the bargain hunter that I am, I find this a great deal!
Okay so let’s get down to it…
SUPPLIES:
- Rectangular Felt Piece (Amazon has a variety pack of 42 sheets)
- Hot Glue
- Pearl Button (I used the half pearl button from my dainty star flower with pearl)
- Scissors
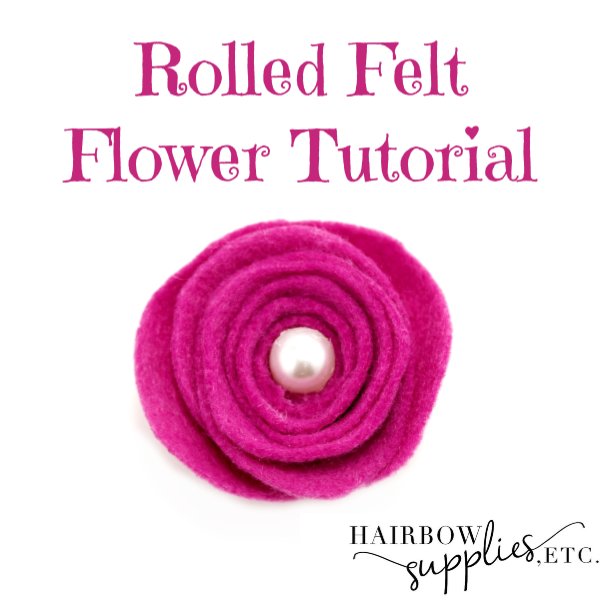
First off, cut your rectangular piece of felt into a 4 inch circle. I eyeballed it and just made it the best circle I could. Now, take your circle and start off at the top, and cut into your circle. What we’re going to do is spiral it. Cut up to the left and make your spiral about a 1 inch wide spiral. Continue cutting to the left around until just right before the end, and you’ll have about a 1 inch circle left. Leave that for later.
Next, start at the tiny tip and start rolling your felt around. When you start rolling your felt, you’ll notice that it will start making a rose shape, and that’s what you want. Keep rolling around. 
The top part will make the rose top, and the bottom you’ll use that to hot glue the backing on. When you get to the end of rolling your felt, you’ll just hot glue the last circle part on the bottom and that will be your end. Then take your pearl and put a dab of hot glue in the center, and put your pearl button in the center. I love to cut to felt flowers by hand! ( If you wanted to add a little leaf, you could buy some green felt and make a leaf and glue that in there as well.) And that’s it!
So if you'd like to learn how to make another DIY felt craft, here's a Felt Bow Tie Bow Tutorial for you!
Or check out my Vintage Baby Headband blog post...